Creating a media kit for Singapore bloggers does not have to feel like a chore. It is your professional resume, your highlight reel, and your first handshake with a brand all rolled into one PDF. When done right, it tells brand managers exactly why they should work with you and not the next creator. In a market like Singapore, where competition is tight but opportunities are plentiful, a well crafted media kit can be the difference between a reply and a silent rejection.
Let us look at the five essential elements that every winning media kit must include, plus the common mistakes Singapore creators make and how to avoid them.
A strong media kit for Singapore bloggers needs five core parts: a clear audience snapshot, authentic metrics, a portfolio of past collaborations, a rate card, and a compelling bio. Focus on local relevance, use real numbers, and keep the design clean. Brands want proof that you can deliver results for their specific campaign goals.
Why Your Media Kit Matters More Than Ever in 2026
Singapore’s creator economy has matured. Brands no longer sign deals based on follower count alone. They want to see engagement rates that match the local audience, content samples that feel native to Singapore culture, and a rate card that respects their budget while valuing your work.
A media kit is not just a PDF you attach to a pitch email. It is a strategic document that answers questions before they are asked. When a brand manager opens your media kit, they should instantly know:
- Who you are
- Who your audience is
- What results you have delivered
- How much you charge
- How to contact you
If any of these are missing, the brand will likely move on to the next creator. That is why it pays to spend time getting it right.
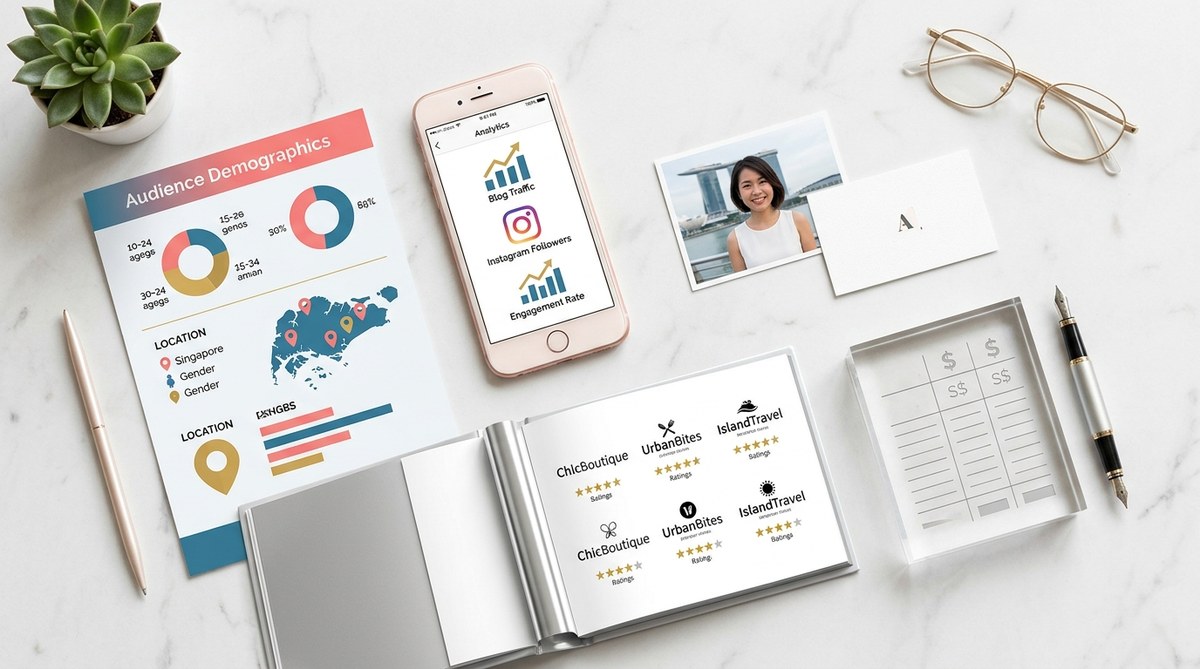
Element #1: The Audience Snapshot (Demographics and Psychographics)
Brands care about your audience more than they care about you. They want to know if your followers match their target customer profile. For a Singapore blogger, this means going beyond age and location.
What to Include in Your Audience Snapshot
- Age range and gender split
- Top residential areas or regions (e.g., Singapore, Malaysia, Indonesia)
- Key interests (e.g., food, travel, beauty, parenting, finance)
- Income bracket or spending habits (if known)
- Platform breakdown (e.g., Instagram, TikTok, YouTube, blog)
For example, if you run a food blog focused on hawker reviews, mention that 70% of your audience lives in the central and eastern parts of Singapore and visits hawker centres weekly. That kind of detail makes you irresistible to a hawker clientele brand or a food delivery service.
Expert tip: Use your own analytics to pull these numbers. Do not guess. Brands often ask for screenshots, so be honest from the start. If your audience is 60% female aged 25 to 34, say it. Authenticity builds trust.
Element #2: Real Traffic and Engagement Metrics
Numbers speak louder than words, but not all numbers are equal. In Singapore, brands are becoming skilled at spotting inflated followers or fake engagement. Your media kit should showcase metrics that matter.
| Metric Type | What Brands Look For | Common Pitfall |
|---|---|---|
| Follower count | Growth trend over months | Stale or stagnant followers |
| Engagement rate | Comments, saves, shares per post | Buying fake likes or comments |
| Reach and impressions | Actual eyeballs on your content | Confusing reach with followers |
| Blog traffic (if applicable) | Unique visitors, page views, bounce rate | Not updating stats regularly |
How to Present Your Metrics
- Use a simple chart or table like the one above
- Highlight the most impressive numbers first
- Compare your stats to your niche average if possible
For instance, if your engagement rate is 4% while the Singapore influencer average is 2%, put that front and centre. Brands love to see data that shows you outperform your peers.
Element #3: A Portfolio of Past Collaborations
Nothing builds credibility like proof of work. Your media kit should feature 3 to 5 examples of brand partnerships you have completed successfully. For each collaboration, include:
- The brand name and logo
- The campaign objective (e.g., increase awareness, drive sales)
- The content format (e.g., Instagram Reel, blog post, YouTube video)
- Key results (e.g., 10,000 views, 500 clicks, 5% discount code use)
- A testimonial from the brand if you have one
Tips for Singapore Creators
- Focus on local brands first. Partners like FairPrice, Singtel, or local F&B chains show you understand the Singapore market.
- If you have worked with international brands, mention how you tailored the content for the Singapore audience.
- Use screenshots or thumbnail images to make the section visually appealing.
If you are just starting out and have no paid collaborations yet, include any partnership where you received free products or services. Even unpaid collaborations count as proof of your ability to create branded content.
Element #4: A Transparent Rate Card
Many Singapore bloggers shy away from listing prices, worried that they will scare off brands or seem too expensive. But hiding your rates often leads to wasted time on back and forth emails. A clear rate card shows you are professional and confident.
What to Include in Your Rate Card
- Basic sponsorship package (e.g., one Instagram post + one Story)
- Premium package (e.g., Instagram Reel + blog post + TikTok video)
- Add-on services (e.g., extra revisions, usage rights, exclusivity period)
- Your rates in SGD (Singapore dollars)
- Payment terms (e.g., 50% upfront, 50% on delivery)
How to Set Your Rates
Research what other creators in your niche charge. A good rule of thumb for Singapore bloggers in 2026 is to charge between $100 and $500 per 10,000 followers, adjusted for engagement. Niche expertise commands higher rates. A tech reviewer with 5,000 followers but a 10% engagement rate can charge more than a lifestyle blogger with 20,000 followers and 1% engagement.
Make sure your rate card is easy to scan. Use a table or bullet points. Avoid fluffy language like “customised pricing available” unless you truly offer bespoke packages.
Element #5: A Compelling Bio and Contact Information
Your bio is your elevator pitch. It should be concise, memorable, and tailored to your niche. For a Singapore blogger, include a mention of what makes you unique. Maybe you are the only parent blogger covering East Coast family activities. Maybe you are a fashion creator who shops exclusively at local boutiques.
Must-Haves in Your Bio Section
- Your name and handle
- Your niche and what you are known for
- A sentence about your audience (e.g., “I help young professionals in Singapore eat well on a budget”)
- Your location (Singapore)
- A call to action (e.g., “Let’s create content that converts”)
- Contact email and preferred method (DM or email)
Do not forget to include your contact email in large, clickable text. If you use a link in bio tool, mention that as well.
Example Bio
“I am Aisha, a food and travel blogger based in Singapore. My audience of 30,000 food lovers trusts my recommendations for hidden hawker gems and affordable staycations. I have partnered with 15 local brands including [Brand A] and [Brand B]. Reach me at [email protected] for collaboration enquiries.”
Common Mistakes Singapore Bloggers Make in Their Media Kits
Even experienced creators mess up their media kits sometimes. Here are the most frequent errors and how to fix them.
| Mistake | Why It Hurts | How to Fix It |
|---|---|---|
| Outdated stats | Brand thinks you are inactive | Update your metrics every quarter |
| Too much text | Brand loses interest | Use bullet points and visuals |
| No rate card | Brand assumes you are expensive | Be transparent about pricing |
| Poor design | Looks unprofessional | Use Canva or hire a designer |
| Ignoring Singapore context | Brand does not see local relevance | Include local examples and audience data |
Another mistake is sending a media kit as a Word document or a link that requires login. Always export to PDF and host the PDF on Google Drive, Dropbox, or your own site. Brands want to open it instantly.
How to Build Your Media Kit: A Step by Step Process
If you are starting from scratch, follow these six steps to create a media kit for Singapore bloggers that gets results.
- Collect your analytics. Pull screenshots of your Instagram insights, YouTube Studio data, and Google Analytics for your blog. Save them in a folder.
- Write your bio. Keep it to three sentences maximum. Highlight your niche, your audience, and your past results.
- Select your best collaboration examples. Choose 3 to 5 that show variety and strong results.
- Create your rate card. Research what other creators charge and set your prices. Be willing to negotiate later, but start firm.
- Design the layout. Use a template from Canva or Notion. Keep it clean, using your brand colors and fonts.
- Review and update. Ask a friend or fellow blogger to review it. Update your stats every month or quarter.
For more detailed guidance on preparing for your first brand deal, read our article on how to land your first brand deal as a Singapore blogger in 2026. It walks you through the pitching process step by step.
Your Media Kit Is a Living Document
Your media kit is not something you create once and forget. It should evolve with your brand. As you gain more experience, land bigger collaborations, and grow your audience, your media kit should reflect that growth.
Set a reminder to review your media kit at the start of each quarter. Replace old metrics with new ones. Swap out older portfolio examples for fresher ones. Adjust your rates if you see your engagement climbing.
Singapore’s brand landscape values professionalism and authenticity. A media kit that is well designed, data driven, and localised to the Singapore market will set you apart from the crowd.
Go ahead and open Canva or your design tool of choice. Start with the audience snapshot. Then add your metrics, your portfolio, your rate card, and your bio. Test it by sending it to a few small brands first. Gather feedback and improve. Before you know it, you will have a media kit that opens doors to the collaborations you deserve.